• Home
  • Recipes
  • Blog
  • About
  • Contact
  • Home
  • Recipes
  • Blog
  • About
  • Contact
Real Life Outlaw
  • Home
  • Recipes
  • Blog
  • About
  • Contact

Blog

by Sarah Outlaw
Access Octomono Masonry Settings
I blog about real food, nutrition, DIY, and herbal wisdom…the Outlaw way!
    Picture

    About Me

    ​I want to help change the lives of others the way my life was changed through better health. I am an advocate of getting back to natural, as much as possible. 

    Subscribe

    email > Subscribe
    Categories


    All
    Adaptogen
    Almond
    Asparagus
    Autumn
    Baby
    Blueberry
    Breakfast
    Butternut Squash
    Cake
    Chia
    Chicken
    Chicken Wings
    Chocolate
    Cocktail
    Coconut
    Cold
    Cucumber
    Desserts
    DIY
    Drinks
    Electrolyte
    Food Allergies
    Fruit
    Gelatin
    Ginger
    Gluten Free
    Gluten-Free
    Grain Free
    Harvest
    Herbal
    Holiday
    Honey
    Ice Cubes
    Kickstarter
    Lip Scrub
    Macaroons
    Main Dish
    Mangos
    Meal Plans
    Migraines
    Mocktail
    Natural Living
    Nuggets
    Oatmeal
    Organic
    Parfait
    Peaches
    Peanut Butter
    Pear
    Picnic
    Pot Cream
    Protein Balls
    Pumpkin Pie
    Radish
    Ranch
    Real Food Basics
    Real Life
    Recipes
    Remedies
    Salad
    Shrimp
    Side Dish
    Smoothie
    Smoothie Bowl
    Snacks
    Sore Throat
    Soup
    Spaghetti
    Spices
    Spicy
    Squash
    Sriracha
    Strawberry
    Stress Relieve
    Summer
    Tea
    Teriyaki
    Toddler
    Varicose Veins
    Waffle
    Water
    Weight Loss
    Workout
    Yogurt
    Zucchini

    ARCHIVES

    Archives

    November 2021
    October 2021

    RSS Feed

⇠ Back To Blog

5 Spices You Should Be Cooking With Every Day

10/18/2021

 
Picture

Sometimes it’s the little things we do every day that add up to huge benefits for our health. If you aren’t using at least two of these five spices almost every day now is the time to start!


5 Spices You Should Be Cooking With Every Day: by Kelli Shallal, RD, MPH – Hungry Hobby.

Turmeric

Turmeric is an ancient spice used traditionally in China and India to add flavor to dishes as well as provide medicinal properties. Turmeric contains a compound called curcumin, known to be a potent anti-inflammatory. Studies have demonstrated curcumin’s potential therapeutic effects in a number of different conditions including inflammatory bowel disorders, irritable bowel syndrome, rheumatoid arthritis, and cystic fibrosis. It may also slow tumor growth or prevent tumor formation.
​
How to use it: Turmeric can be bought as turmeric root or in powder form. It is virtually tasteless unless used in very large quantities in which it is a bit spicy. Add ¼ to ½ tsp. it to smoothies, oatmeal, or sprinkle on eggs in the morning. You can also sprinkle it on veggies, onto your salad, or bake it with meats or poultry.
​

Cinnamon

Cinnamon is also touted for its strong anti-oxidant count and ability to decrease inflammation. However, cinnamon is also uniquely known for its ability to promote insulin sensitivity. Insulin resistance is a contributing factor in many metabolic conditions, particularly diabetes and polycystic ovary syndrome. Improving sensitivity to insulin helps the body better manage glucose in the blood-stream. In addition, cinnamon may actually decrease the amount of sugar that enters the blood-stream by interacting with enzymes that break down carbohydrates into sugar. Cinnamon adds a tone of sweetness to any dish so you actually use less sugar in recipes and meals.

How to use it: Cinnamon can be added by ¼ to 1tsp at a time to morning foods like yogurt, oatmeal, and smoothies. You can also add it to baked goods or sprinkle it over coffee grounds to brew cinnamon flavored coffee.
​

Ginger

Ginger is thought of as the go to digestive aid spice. It is known to relieve symptoms such as nausea, heartburn and bloating. Recent research is showing that this spices medicinal properties may go beyond indigestion. Preliminary research supports dramatic reductions in pain post workout and during a woman’s menstrual cycle. In addition, a 2015 study reported dramatic reductions in hbA1c and better blood sugar control in diabetics.

How to use it: Ginger is a nice touch to add to smoothies and a popular component in green juice recipes, but beware, it has a strong spicy flavor. It generally pairs well with soy sauce like dishes such as stir-frys.

Garlic

It’s no secret that garlic is one of the world’s tastiest healthy foods, but did you know that crushing fresh garlic and letting it sit prevents antioxidants from being destroyed during the cooking process? Garlic has numerous health benefits but is known for its protective effects on the cardiovascular system. It actually contains compounds that protect LDL cholesterol from being oxidized. Oxidized LDL is the type of cholesterol that damages blood vessels and causes plaque build up. Garlic can be found in fresh or powdered form but to get the most benefit utilize the fresh stuff. In fact, two cloves a week might be enough to decrease cancer risk.

How to use it: Use fresh garlic to cook with any savory dish, homemade salsas, hummus and dips are delicious ways to get use garlic.
​

Chili Peppers

When you think chili peppers you might initially think about their ability to boost metabolism, but did you know they have many other health benefits? Capsaicin, chili peppers active ingredient, is touted with decreasing inflammation, providing topical pain relief, and promoting cardiovascular health.

How to use it: Most of the capsaicin in chili peppers is found in the seeds or fleshy white membranes of the pepper. Capsaicin adds health benefits but also adds a ton of heat and spice. You’ll want to tailor how much seed and membrane of a chili pepper you include to your spicy tolerance level. Chili peppers make a great addition to any savory dish but you can also get creative. Add them to yogurt for a dip or sweet foods for some kick!
​

Be Well & Thrive!
​

Comments
⇠ Back To Blog

Stuffed Zucchini Boats 2 Ways

10/18/2021

 
Picture

Please give a huge Real Food Outlaws’ welcome to Jolene from Yummy Inspirations!


We are very excited to have new contributors on board providing recipe and nutrition information. They will give us fresh perspective and recipes each week!

Getting kids to eat vegetables can be a tricky battle. My kids will often offer a firm “no” before even tasting the dish. Over the years I’ve tried all sorts of fun ways to prepare and present vegetables in an effort to entice them to be adventurous, try new vegetables and inevitably consume more vegetables.
I’ve done some pretty crazy stuff to get my kids to try new foods, with mixed results. From time to time though, I come across a winner of a dish. A dish my kids, the whole family even, adore…

That’s where these Stuffed Zucchini Boats come in. There are copious amount of veggies concealed within this fun dish and the kids find it difficult to resist.

Of course you can feel free to mix it up and stuff your Zucchini with your veggies of choice totalling two cups to replace the mushrooms, red peppers and leeks – we just find this combination to be so flavorful that we enjoy it this way time and time again.

To me these Zucchini Boats are a fun, veggie, carb free, pizza alternative. So, my preference is to top them with Oregano and Parmesan (proper Parmigiano Reggiano) to give them an authentic pizza flavour.

Vegetarian Stuffed Zucchini Boats

Ingredients:

  • 3 Zucchini
  • Coconut Oil, for frying
  • 1 Cup Chopped Mushrooms
  • 1/2 Cup Chopped Red Pepper
  • 1/2 Cup Chopped Leek (or onion)
  • 2 large or 3 small garlic cloves, peeled and finely diced
  • Handful of Oregano Leaves
  • 1 teaspoon Parmesan (Optional)


​Directions:

  1. Preheat the oven to 180C/350F and get out a baking dish.
  2. Cut the zucchini in half lengthways, remove the pulp with a teaspoon and reserve a half a cup.
  3. Heat a little coconut oil in a large frying pan/skillet.
  4. When hot add the reserved zucchini pulp, mushrooms, red pepper, leek and garlic.
  5. Cook until the vegetables have softened and the liquid has reduced.
  6. Once cooked, remove to a bowl.
  7. Fill the Zucchini Boats with the vegetable mixture and top with the Oregano and optional parmesan.
  8. Place into the preheated oven for 25 to 30 minutes or until golden and the zucchini has cooked through.
​
I believe that life is all about balance so while we enjoy the Vegetarian Stuffed Zucchini Boats, it’s also fun to prepare a meaty version, stuffed with a rich meat filling that’s sure to be a crowd pleaser.

Bolognese Stuffed Zucchini Boats

Ingredients:

  • 3 Zucchini
  • Coconut Oil, for frying
  • 250g/9 Ounces Beef Mince
  • Handful of Oregano Leaves
  • Pinch of Salt
  • 1 Onion, peeled and finely diced
  • 2-3 Garlic Cloves, peeled and finely diced
  • 1/2 Cup Chopped Red Pepper
  • 1/2 Cup Chopped Tomatoes (I used mini roma tomatoes)
  • 2 Tablespoons Tomato Paste


​Directions:

  1. Preheat the oven to 180C/350F and get out a baking dish.
  2. Cut the zucchini in half lengthways, remove the pulp with a teaspoon and reserve a half a cup.
  3. Heat a little coconut oil in a large frying pan/skillet.
  4. When hot add the beef mince and sprinkle over the oregano and salt.
  5. Once the meat has browned add the onion, garlic, red pepper, tomatoes and reserved zucchini pulp.
  6. Stir to combine. After a few minutes add the tomato paste.
  7. Cook, stirring from time to time, until the vegetables have softened a little and the liquid has reduced significantly.
  8. Once the beef sauce has cooked, remove from the heat onto a plate or bowl.
  9. Fill the prepared zucchini with the meat sauce.
  10. Place into the preheated oven for 25 to 30 minutes or until cooked through.


​To watch both of these recipes prepared in action, take a look at the below video:

Both of these Stuffed Zucchini Boat recipes are really easy to prepare and a delicious way to get more veggies into your family meals.
Comments
⇠ Back To Blog

The Best Meal Prep Tips for Less Holiday Stress

10/18/2021

 
Picture

With the holiday season approaching, life can get pretty darn hectic. From decorating your house to carving pumpkins and creating holiday shopping lists, it could feel like you’re always running out of time. If you’re not an avid cook and don’t enjoy spending hours in the kitchen, skipping out on meals and ordering takeout might become your new norm during this time.

Luckily, I have a perfect solution for that. Welcome to the world of meal prepping! But before you begin to make excuses about how time-consuming it is, I’m going to share some of my best tips to make your next meal prep a breeze.

Here are the best meal prep tips for less holiday stress.

1. Make a List

Picture

The most important tip is the first place you should start: write out your menu. It’ll save you from having those “what’s for dinner” nights and ensure you don’t waste any forgotten food in the fridge. Like that bag of lettuce that went bad in the fridge – you know what I’m talking about. You likely didn’t have a plan to use it, so it was forgotten and wilted before you could use it.

Next, break that menu down into a shopping list. As you do, place a check next to all the foods that can be prepped ahead of time. When you do this, you’ll have a good idea of how much time to set aside for meal prep. And it will help you decide whether you should do all the prep work at once or tackle it over a couple of days, for example, once at the beginning of the week and the other mid-week.

2. Create Space in Your Fridge

Picture

​How many times have you gone to the supermarket and come home to find there’s no room in the fridge to put it all? Avoid this mishap by checking your fridge first. Toss anything beyond its expiration date or that you no longer need. While you’re at it, check your pantry, too. You may find you already have some of the ingredients on your list as you look through both.
​

3. Double Up

When possible, double up. Whether it’s an entire recipe or a single food, you can save time and effort by cooking twice as much. For a whole recipe example, say you plan to cook your favorite taco recipe. Rather than making just one, cook two. Then eat tacos a couple of nights a week or save some in the freezer for another night.

The same goes for single foods like roasted or steamed vegetables. Take Brussel sprouts, for example. If you ordinarily roast enough for four servings, instead, make eight. You’ll have plenty to eat as a side to go with several meals throughout the week.

Some great foods to double up on include soup, salads, roasted chicken, baked salmon, and cauliflower rice.
​

4. Divide and Conquer

Picture

As you unload the groceries, divide everything up to figure out what needs to be washed, chopped, seasoned, or stored. For the most part, these are the thing that will go in the fridge or freezer until you need them.

Vegetables can be washed, chopped, and stored in bags or containers. Here are some tips to follow.

  • Clean and cut up greens. Most will stay fresh for up to 3 days.
  • Peel and chop garlic, onion, and shallots. These can be stored for up to 5 days.
  • Chop up hard vegetables like cabbage, carrots, and squash and store for up to 5 days.

Meats and seafood can be seasoned or marinated then put in air-tight containers. Here are some things to keep in mind.

  • Anything you cut and season for a meal you’ll make the following day can go into the fridge.
  • Meats and seafood that you plan to use more than a day out should go into the freezer then thawed a day before you need them.
​

5. Multitask

Picture

You don’t need to be a magician to master the art of multitasking in the kitchen. You just need to be good at juggling. If you can prep two or three things at the same time, you’ll save loads of time. Here are some things you can multitask.
​
  • Do double time by roasting a pan of vegetables while also roasting a pan of chicken.
  • Put a pot of grains on to boil, and while you’re waiting for it to cook, whip up a sauce in another pan.
  • Cut up your fresh fruit and vegetables and separate them into containers while you wait for your meat to bake.
​

6. Clean as You Go

Picture

The last thing you want to see after a meal prepping session is a mountain of pots, pans, and dishes you still have to clean. Save yourself the horror by cleaning up after yourself as you go. Place what you can in the dishwasher and wash everything else as you finish using it.
​

Less Stress for the Holidays

Picture

Mike Murdock once said, “The secret of your future is hidden in your daily routine.”

Once you figure out your perfect meal-prepping routine, it will no longer feel like a chore. And you can reap all the benefits. Meal prepping allows you to properly nourish your body with your favorite recipes as well as new recipes that will make your taste buds tingle. It can also save you money by eating at home and wasting less food.
​
But most importantly, during the holiday season, it can make your life a little less hectic. And it can help minimize holiday stress. Start by implementing the tips in this post and check out my other blog posts for more inspiration.

Be Well & Thrive!

Comments
⇠ Back To Blog

Summer Snack Ideas

10/18/2021

 
Picture

Having the kids home all day, every day inevitably leads to regular bouts of the “I’m hungry’s”… even if they just ate their previous meal!


My kids are home with me throughout the year, so I’m used to handling these sorts of situations. I follow a number of different strategies, depending on the day, their mood and my mood.
​
The goal is to keep the kids nourished, without making yourself completely crazy in the process. So, here we go:

Offer A Vegetable Platter

Prepare a plate full of in season vegetables. Make it a habit to do this first thing in the morning so a plate will be ready and waiting at the first cries of “I’m hungry!”. They may turn their nose up at vegetables, but – be stern, if they are really and truly hungry they will eat, otherwise they will just have to wait for the next meal.
​

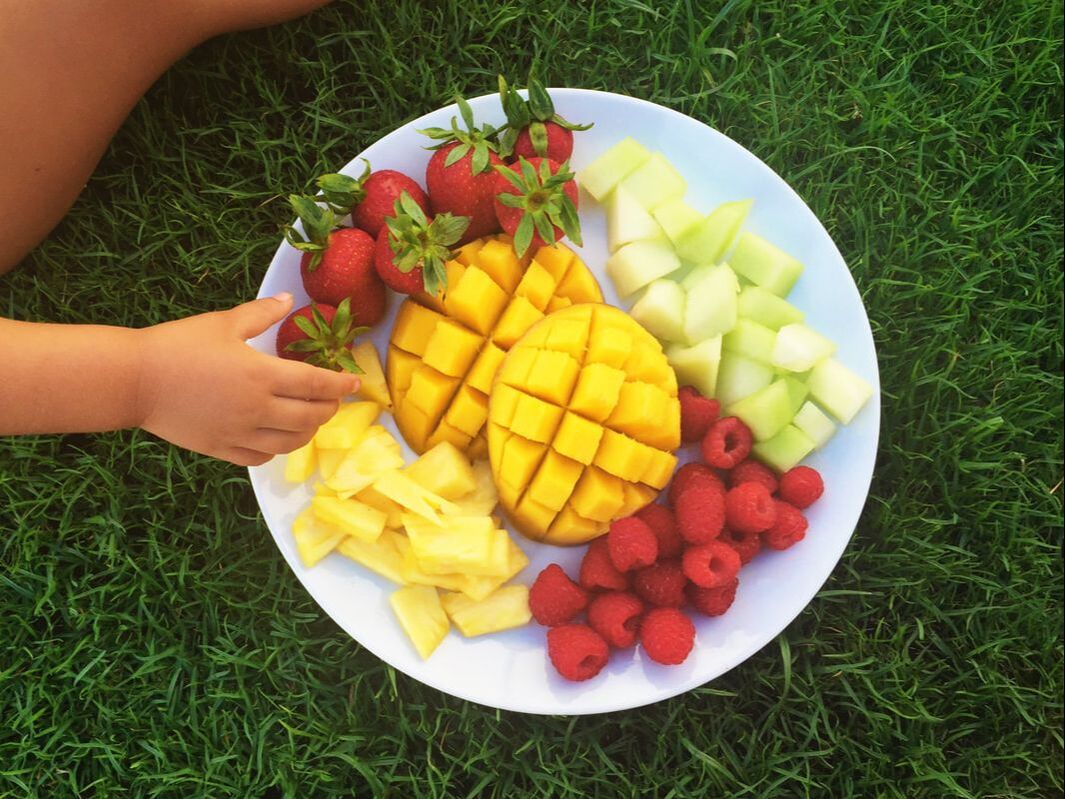
Offer A Fruit Platter or Kebabs

If you’re feeling a tad creative, then thred chopped fruit onto skewers for fruit kebabs. You could even get the kids involved and make the whole snack into an activity- hand them fruit, kid safe knives and skewers and instruct them to get creative.
​
My kids construct buildings and other structures when they are allowed to simply “play with their food”.
​

Make Homemade Snacks

Another way to turn snack time into an activity is to get cooking together. There are tons and tons of cooking with kids activities that you could do – from baking cakes or cookies to churning up ice cream together. Or you could pick from any other healthy kids snack to make.
​

DIY Trail Mix

You could assign a cup, bowl or jar per child to fill with their very own snack selection. They can then have their own snack source that they can go to whenever they get hungry.

To start, lay out a selection of snacks and then get the kids to fill their cup/bowl/jar with their own choice. Here’s a couple of our own personal favourite trail mix inclusions:

  • Nuts
  • Seeds
  • Coconut
  • Dried Fruit
  • Organic Granola/Cereal
​

Prepare a second course of their previous meal

If they didn’t eat enough at breakfast or lunch I’ll simply offer them another round of the same.

Sometimes they are pre-occupied during their meals, they don’t want to sit for long as they want to get back to whatever they were doing before I “rudely interrupted them” to call them to the table for their meal. They leave the table without finishing, or when they haven’t eaten quite enough and before long the “I’m hungry’s” strike and I swiftly serve a second course of the previous meal.
​

Make Smoothies

There’s nothing like a refreshing smoothie on a warm day. The kids can pick their own mix of ingredients and blitz them up for a fun and filling snack.

Again – making smoothies also doubles as an activity as the kids can pick their fruit (and possibly vegetable) inclusion and any other yummy extras to make their smoothie their own.
​

Maybe they are thirsty not hungry?

Often they may not be actually hungry but thirsty instead. I encourage my kids to drink water, wait a couple of minutes and if they are still absolutely ravenous then we will chat about making a snack or I’ll refer to one of the above tactics.
​

Last resort…

Bring the next meal forward! Get them to help you prepare the next meal, many little hands make light work.
​

Over to you – what do you do to keep your kids nourished between meals? Do you have any go to strategies which work? I’d love to hear from you!


​About Jolene: Aussie Mum of 2 Jolene is passionate about marketing real food to kids and inspiring other parents to do the same. She shares easy family meal ideas and inspiration on her food blog Yummy Inspirations. Subscribe to receive the FREE weekly newsletter, packed full of easy recipes and food inspiration plus exclusive, subscriber only content. Click here to subscribe now.
Comments
⇠ Back To Blog

Cassava Flour Chocolate Cake

10/18/2021

 
Picture

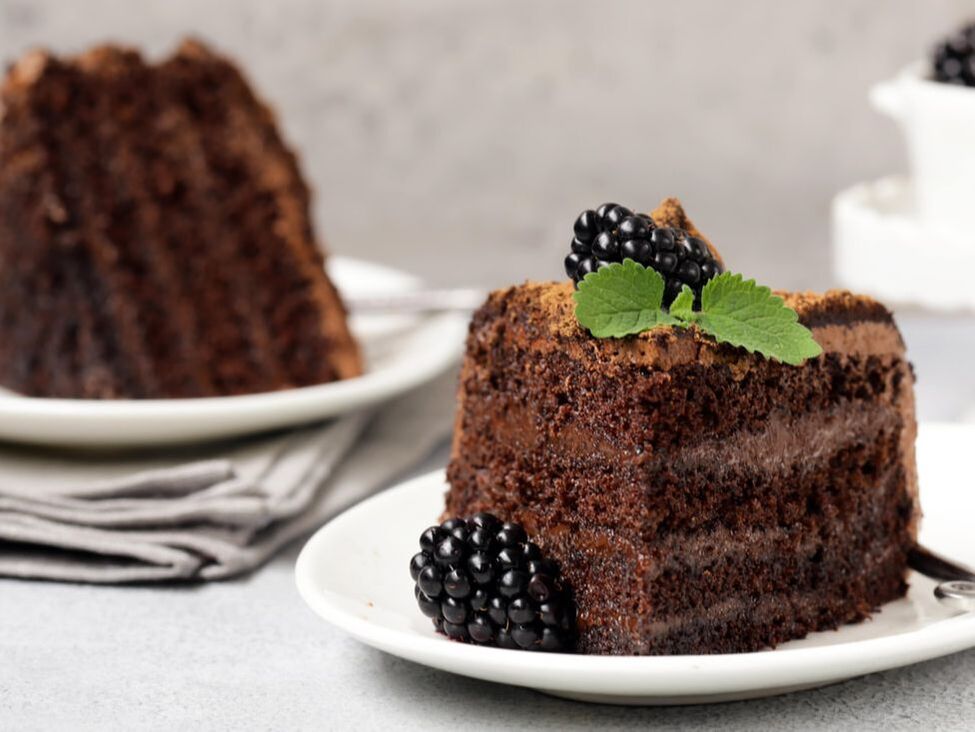
I was thrilled to hear that Erin from Eat Real, Stay Sane was going to bake up a Cassava Chocolate Cake for us this month! It’s a great option for grain-free, gluten-free birthdays and celebrations!


One caveat to this recipe: you all know I am very strict with sugar. There is quite a bit of sugar in this recipe. Natural or not, sugar is sugar. It’s ok to use less than the recipe calls for. I know I prefer a less sweet cake. Remember, this is a special occasion treat!

​Cassava Chocolate Cake – by Erin Smith

Before I’d gotten on the real food bandwagon, someone at work brought a store-bought, gluten-free cake.

Most coworkers kept their distance, making snide remarks like “If I’m gonna eat the calories….”

I was among the brave who tried it, and I wish I hadn’t. Terrible, disgusting, flavorless. Contrary to popular belief, chocolate DOES NOT cover all else.

In other words, I know what a bad chocolate cake tastes like, and this ain’t it.

In order to achieve “gluten-free” status, I used cassava flour (it’s all the rage amongst the real foodies). It’s a starchy root, kind of like a potato. Just don’t imagine that it tastes like you’re adding potato flakes, because that would be gross.

Cassava flour has a slight earthy taste to it, but in a good way. It is extremely nutritious, containing good sources of potassium, vitamin C, fiber, and even some protein, iron, and magnesium.

The beautiful part is that you can trade it out in a 1:1 ratio with flour, and still keep a similar consistency. I’d say it’s slightly denser than normal cake, but it just makes it a little fudgier… so no complaints here.

A couple weeks ago, it was our Little Man’s 2nd birthday, which is crazy and insane. He’s not much of a dessert eater – he signs “grapes” or “strawberries” pretty much at every meal. He needed a little encouragement to dig into his chocolate cassava flour cake, but once he did, that stuff got ate.
​

My parents also devoured the cake and passed along rave reviews.


Along with the cassava flour, you’ll see that I’ve used sucanat, organic sugar, and other healthier ingredients. I wouldn’t call this a weight loss meal, but it sure beats processed, GMO ingredients that provide no nutritional benefit or even block other nutrients from entering your system.

In other words, it’s a dessert you can be confident your family will like, and you can sit back, arms crossed, smiling at your achievement. You can check out our date cake and brownie recipe too if those sound tasty to you.

Enjoy your cake!


Ingredients:

Buttercream Frosting
  • 3 Cups organic powdered cane sugar
  • ½ Cup softened pastured butter
  • 1/2 Cup cacao powder
  • 2/3 Cup raw milk

Cake
  • 1 Cup sucanat
  • 1 Cup organic cane sugar
  • 1 Cup softened pastured butter
  • 1 Cup warm filtered water
  • 1 Teaspoon real vanilla
  • 2 pastured eggs
  • ½ Cup cacao powder
  • 1 ½ Cups cassava flour
  • 1 Teaspoon baking soda
  • 1 Teaspoon unrefined sea salt


Instructions:

For Cake:
  1. Preheat oven to 350 degrees and line bottom of 8-inch cake pan with parchment paper and butter.
  2. Cream Sucanat, sugar, softened butter.
  3. Add cacao, warm water, and vanilla.
  4. Mix in eggs one at a time until combined. Do not over-mix or your cake will come out flat.
  5. In separate bowl, sift together cacao, flour, soda, and salt. 
  6. Slowly add flour mixture to wet mixture and mix until combined.
  7. Pour half of the mixture into cake pan and bake for 20-25 minutes until edges look crisp and knife comes out clean when inserted into the middle.
  8. Immediately after taking pan out of oven, run a knife around the edge of the pan. After about 10 minutes, remove from pan and let cool on a cooling rack.
  9. Repeat baking process for second layer.

For Frosting:
  1. Combine powdered sugar, butter, cacao, and vanilla.
  2. Add small amounts of milk until desired consistency is reached, usually very fluffy and not runny or your cake will slide all over. You probably won’t need the entire 2/3 Cup just FYI!
  3. After cake layers are cool, frost the top of one layer, add the top layer and frost the top then the sides. Store covered so the cake doesn’t dry out.
​

Eat Well & Thrive!

Comments
⇠ Back To Blog

Stone Fruit Gelatin Dessert

10/18/2021

 
Picture

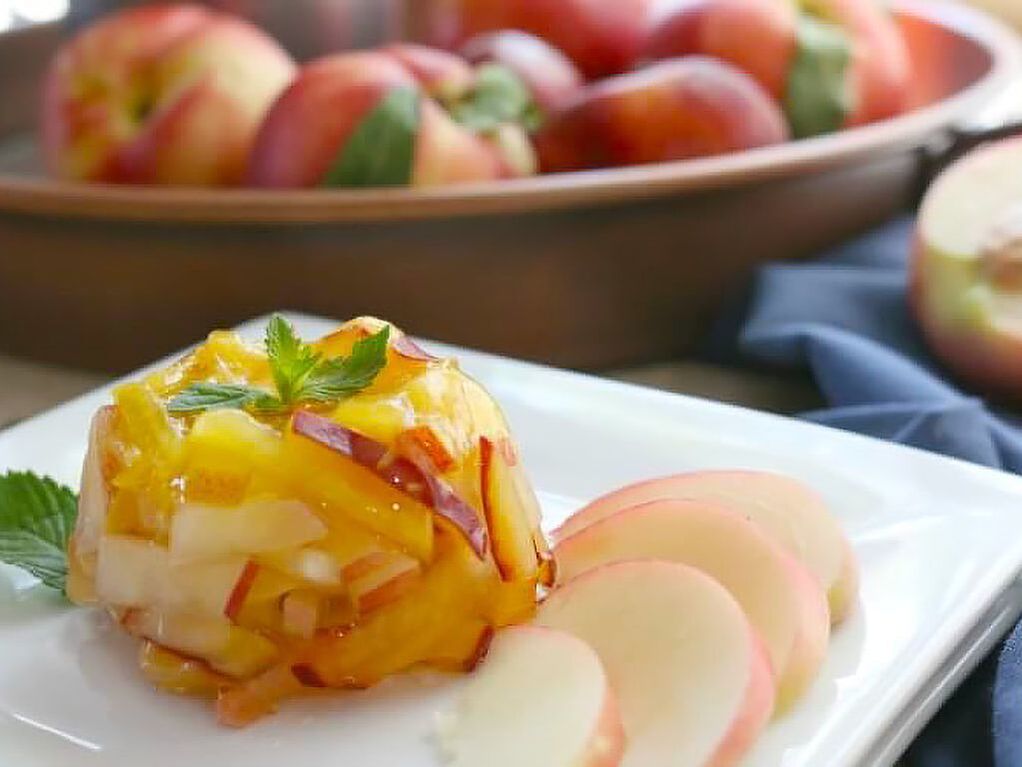
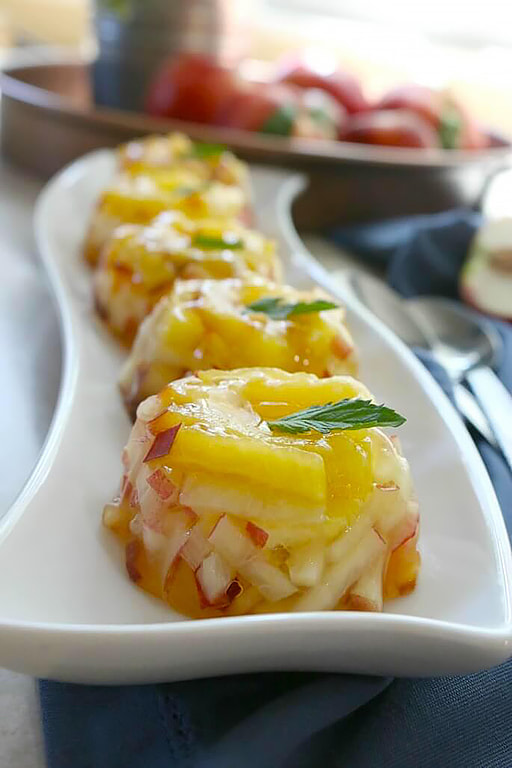
When your favorite stone fruits are combined with coconut water and grass-fed gelatin, a delicious treat ensues. These sweet morsels make a beautiful addition to any celebration or for no other reason than self-indulgence.


This time of year, the vendors at farmers markets always offer a variety of stone fruits – plums, peaches, apriums, plumcots, nectarines, pluots, among others. I was able to snag a few pounds of yellow peaches, white nectarines, and donut peaches last week from my favorite vendors. With titles like apriums and pluots – they sound more like something from an astronomy textbook than edible delights but they’re delicious nonetheless.
​
Some of these fruits are hybrids that combine varieties of plums, apricots, and peaches. Others are more of the heirloom variety that have been careful bred to preserve the traditional genome of the fruit. But they are all sweet, juicy and delicious in it’s own way. Shaking off the heels of winter, stone fruits kindly remind us that summer is officially here regardless of the date on the calendar. And as such, recipes calling for these tender fruits are in order. Everything from grilled peaches, to fruit salads, to plum cobblers – now is the time to enjoy the intense sweetness these gems offer.

Picture


Why Gelatin?

I’ve learned to adapt to my children’s picky palates (which has improved tremendously with a real food diet) – but not at the expense of depriving them from much needed nutrition. For example, smoothies can be used as a vehicle to add more nutrition into their diets. I personally, always preferred to eat my greens in the form of a salad, but I quickly realized that crabby toddlers don’t always appreciate baby spinach and radicchio with balsamic dressing, hence the need to add greens to a smoothie.

Likewise, treats made with grass fed gelatin can also a great way to boost the daily nutrient intake. I talk about the origins and health benefits of gelatin in this post on The When, How and Why of Aspic (aka Meat Jello). In short, gelatin is a great source of nutrition including amino acids glycine and proline which are important for proper skin, hair and nail growth as well as optimal immune support. Gelatin also soothes the gut lining, making nutrient assimilation more effective.

Gelatin that is shelf-stable and sold in powder, is essentially bones, cartilage, and tendons cooked down for extended period of time, breaking down the collagen and then dried and ground into fine powder for us to use. That’s why it’s incredibly important that you seek out the best quality gelatin. I’m currently using THIS brand but have used THIS with great success as well. The good news is that gelatin is making a comeback and more and more companies are seeking the best quality sources to make gelatin for their always-growing customer base.

In addition to regular soups made from traditionally prepared bone broth, I am purposeful in making gelatin treats as snacks or deserts for an extra boost of nutrition. These Gut-Healing Strawberries n’ Cream Gelatin Cups are a hit at our home, and they especially make a extraordinary treat for a birthday and other celebrations.

by Anya @ Prepare & Nourish
​

Ingredients:

  • 1 1/2 pounds of stone fruit
  • 1 1/2 tablespoons of gelatin (THIS or THIS brand)
  • 1 1/2 cup of coconut water, divided
  • 1/2 cup boiling water


Tools needed:

box grater, glass measuring cup, muffin pans, or bundt cake pan
​

Instructions:

I love using a variety of stone fruits for different tones of sweetness in these gems. I layered yellow peaches, white nectarines, followed by backyard plums, all chopped in miniature pieces. You can also use a box grater, and grate on largest if that’s easiest. Sprinkle gelatin over 1/2 cup of coconut water in a glass measuring cup, give a quick stir and set aside to “bloom”. Meanwhile, place the chopped fruit in muffin pans or mini bundt cake pans for individual servings (great for parties) but a regular bundt cake pan works great too.

Add 1/2 cup of boiling water to the bloomed gelatin (it should have set by now) and stir well with a fork. There should be no clumps. Add additional 1 cup of coconut water and continue to stir well. Add 1-2 tablespoons of honey, if you care to have it more sweeter, otherwise, completely leave it out and enjoy the sweetness of the fruits. Carefully pour into the muffin cavities, completely covering the fruit and coming all the way to the top. Give the pan a gentle tap on the counter to make sure that the coconut water reaches between the fruit and to the bottom. Place in the refrigerator for 2 hours, overnight is best.

To Unmold:​

Prepare a sink of 1″ of warm water. Place the gelatin pan directly into the water for 10-15 seconds, being careful not to get water into the fruit. Remove the pan from the sink and cover with a large cutting board or another flat surface. Quickly invert the gelatin onto the board. At this point, you can stick it back in the refrigerator or plate.

Stone Fruit Gelatin Dessert makes a beautiful addition to any party, 


​Whether you have them in small single servings or a decorative bundt cake pan. More than that, it adds nutrition from the gelatin and electrolytes from the coconut water, making this a perfect treat on a warm day. I’ll be sure to make this several times as long as stone fruits are readily available.
​

Eat Well & Thrive!

Comments
⇠ Back To Blog

Peanut Butter Cups. Quick and Easy.

10/18/2021

 
Picture

It’s like clockwork every month! Our hormones go amok, and we’re hit with PMS and the accompanying sweet tooth cravings. Why does this happen? Our body’s natural response to hormonal changes around our period can cause a drop in blood sugar levels. And this can lead to cravings for foods loaded with sugar. Also, if you are specifically craving chocolate, that’s your body yelling at you that you need magnesium.

Sure, it’s nice to treat yourself during this time. Heck, you deserve it! But you should still be mindful to not overdo it with junk food that can sabotage your health goals. You may enjoy it for a moment, but once the sugar rush dissipates, you’re right back to craving sweets again.

There’s more. Sugar, particularly refined sugar, is an inflammatory that causes your body to retain water and sodium. This may cause you to experience more bloating, cramping, and mood swings. No, thank you!

So, what’s a girl in the throes of PMS to do? Don’t worry, I have a special treat for you to satisfy these cravings when they hit.

Ingredients to Beat Those Period Cravings

It’s my recipe for a healthier version of your traditional sugar-laden peanut butter cups. These quick and easy homemade chocolate peanut butter cups are the perfect treat to nip those pesky PMS cravings we get every month. Made with all-natural good-for-you ingredients, they’re delicious AND nutritious. All you need are three simple ingredients: dark chocolate, coconut oil, and peanut butter. It’s that simple!

Now, let’s talk about those ingredients. You may be wondering, is dark chocolate really ok during your period? Surprisingly, it is! Not only can dark chocolate satisfy your sweet tooth during that time of the month, but it’s high in potassium. This nutrient can stop you from retaining water and feeling bloated. Potassium also helps your muscles to function, which is ideal for when period cramps hit.

Then there’s peanut butter, which can benefit your health in many ways. It contains healthy fats, fiber, and protein that can help you feel fuller longer. And it’s full of nutrients and vitamins like vitamin E, which reduces inflammation and can help with cramping. Plus, peanut butter is a complex carbohydrate, so it breaks down more slowly in your system. This means you don’t experience the big spike in blood sugar levels that can come with refined sugar.

For our third and final ingredient, we have coconut oil. This superfood can actually help balance your hormones, which can go all sorts of crazy during your period. How? The fatty acids in coconut oil can help hormone functions that support the creation, processing, and elimination of estrogen and progesterone. This can lead to the hormonal balance your body needs.

Ok, enough chatting. Here’s everything you need to know to make these bad boys!
​

Healthy Homemade Peanut Butter Cups

A quick and easy recipe for that time of the month.

No-Bake, Raw, Gluten-free, grain-free, low carb, low sugar, vegan, vegetarian, dairy-free, egg-free, Paleo, Keto
​
Prep Time: 15 minutes
Chilling Time: 30 minutes
Total Time: 15 minutes
Servings: 12

Ingredients:

  • 8-12 ounces dark chocolate
  • 1 cup all-natural creamy peanut butter, with no added sugar (almond butter if Paleo)
  • 6 tablespoons virgin coconut oil, melted


Directions:

  1. Line a 24-cup mini muffin pan or spray with coconut oil cooking spray and set aside.
  2. Chop chocolate into small pieces. Place in a medium glass bowl and add 3 tablespoons of coconut oil.
  3. Place the bowl over a pot with simmering water. Continually stir with a wooden spoon or spatula until chocolate is completely melted to avoid burning the chocolate.
  4. Once the chocolate is melted, set heat to low.
  5. Pour 1 tablespoon melted chocolate into each cup. Place cups in the freezer for 5 minutes or until chocolate is set while making the peanut butter layer.
  6. Add peanut butter and 3 tablespoons of coconut oil to a medium bowl. Stir until incorporated evenly.
  7. Take the muffin pan out of the freezer and scoop 1-2 teaspoons of the peanut butter mixture to each cup. Place in the freezer for 15 minutes.
  8. Take the muffin pan out of the freezer and pour the remaining melted chocolate on top of the peanut butter. Return to the freezer for 30 minutes.
  9. Once set, pick up the muffin pan and shake and tap to help release the chocolate cups.
  10.  Optionally, sprinkle a pinch of Himalayan sea salt on top.
  11.  Enjoy!
​

Storage:

Place them in a freezer-safe container, store them in the fridge or freezer and enjoy anytime you need a healthy treat! They should last about 3 months or longer.
​

Consistency:

If the peanut butter cups are too thick, add an extra tablespoon of coconut oil or peanut butter.
​

Note:

 If you’re allergic or sensitive to peanuts, you can sub any nut butter (almond, cashew, hazelnut).
​

Guilt-Free Treat to Calm PMS Cravings


I hope you love these nutritious treats to calm your PMS cravings. What’s your favorite sweet treat or guilty pleasure snack when you PMS? Let us know in the comments.

Did you make this quick and easy recipe? Don’t forget to share a picture and mention @reallifeoutlawblog and #reallifeoutlaw.

Be Well & Thrive!

Comments
⇠ Back To Blog

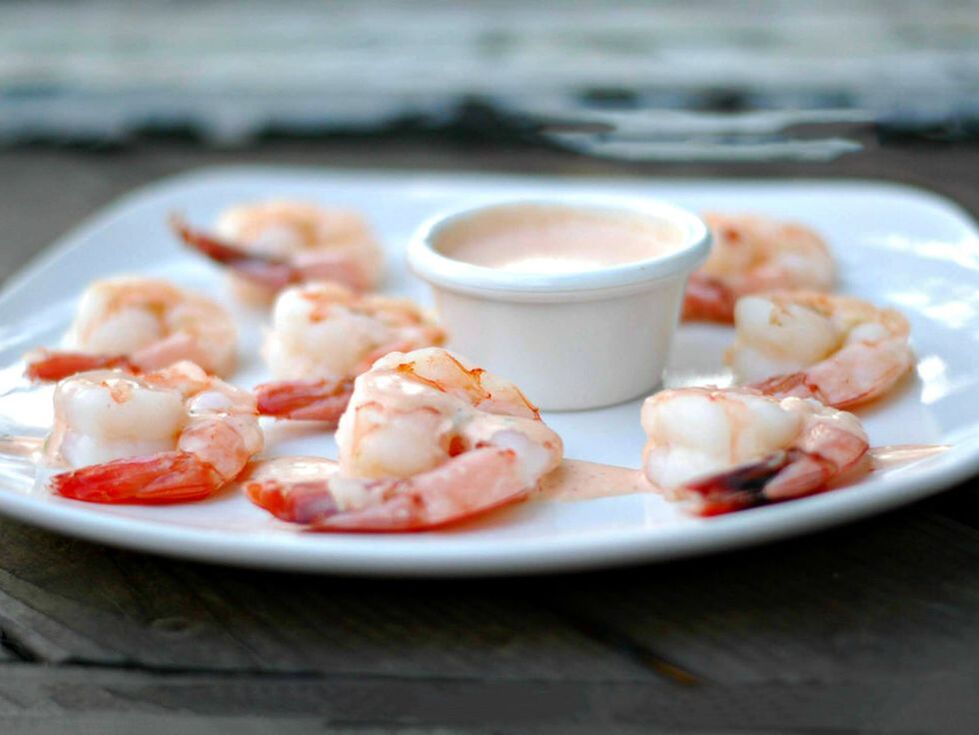
Jumbo Shrimp with Sriracha-Ranch Cocktail Sauce

10/15/2021

 
Picture

My husband bought me a new camera lens! I am so excited to start out with better photography! It is amazing what a huge difference a lens can make in the quality of a photograph. This is the lens I got HERE.

On New Year’s Eve we decided to have “snacky” foods so I made some hummus, cheese dips and Buffalo Wings. We also had some little appetizer-type food including  jumbo shrimp. I wanted to change up the usual horseradish and ketchup cocktail sauce and we love sriracha around here. Oh, and ranch! We love ranch dressing!

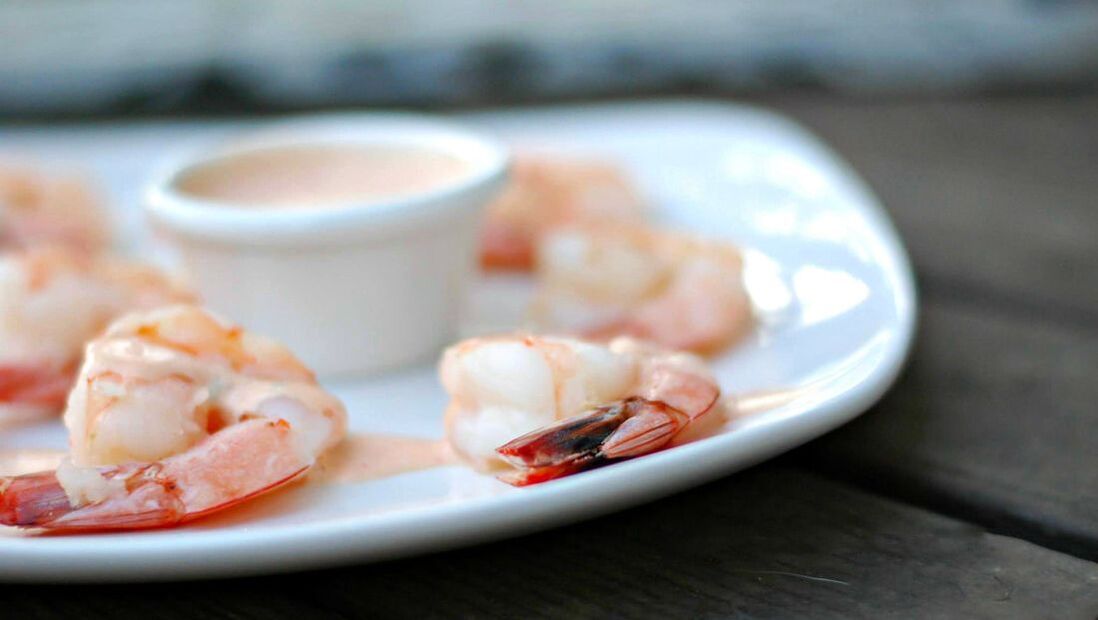
We put all of those favorite things together and came up with jumbo shrimp with sriracha-ranch cocktail sauce!

Picture

I buy my sriracha. I haven’t attempted to make it on my own yet but there is an amazing looking recipe for it from Michelle over at Nom Nom Paleo. I love THIS ranch dressing recipe from Hayley over at Health Starts in the Kitchen! If you buy your ranch, look for one without canola or soy oil…if that’s even possible. 

I grow horseradish in my garden so I went out and dug up some of the root to use in this recipe. You can buy horseradish but make sure it’s plain and not horseradish sauce. That stuff has nasty additives in it that you don’t want.

Ingredients:

  1. 1 lb jumbo shrimp
  2. 1 or more tsp sriracha sauce
  3. 1 or more tsp fresh horseradish root (grated) or prepared horseradish
  4. 1/2 cup ranch dressing


Instructions:

  1. Boil water and turn off burner.
  2. Add shrimp and let sit in hot water just until they turn pink.
  3. Strain.
  4. Mix sriracha, ranch and horseradish in a small bowl.
  5. Serve with shrimp.

Notes

  1. Amounts are easily changed based on taste.

These shrimp were quickly devoured and deemed delicious by my lovely taste testers. The sauce is spicy and tangy. It’s perfectly paired with the mildly sweet flavor of the shrimp. You’ll love this!

Be nourished. Be happy.

Comments
⇠ Back To Blog

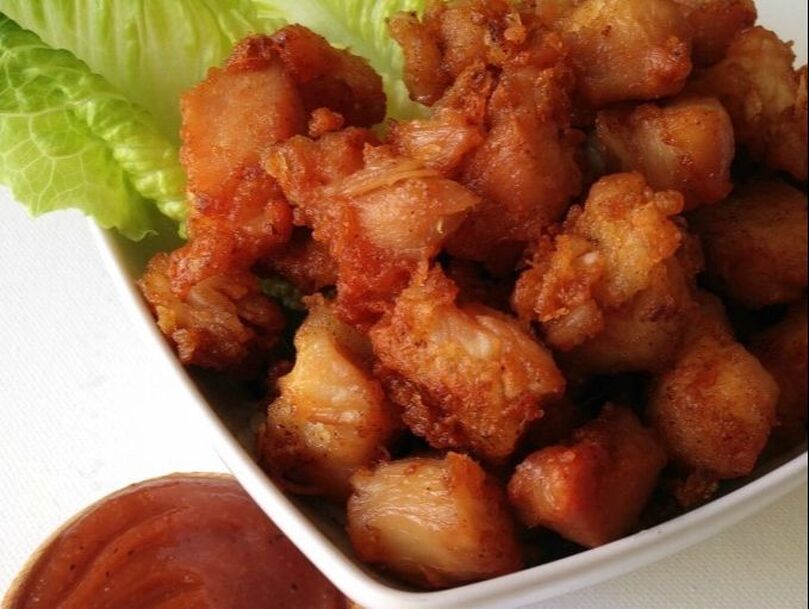
Grain Free Chicken Nuggets

10/15/2021

 
Picture

There’s nothing like classic chicken nuggets. They’re so easy to make too! So whip up your own healthier, crispy, simple and delicious chicken nuggets. 


Chicken Nuggets are such a fun finger food. Both kids and adults love them. 

Many of us adults grew up eating lots of chicken nuggets, usually from not-so-great sources. We’ve grown up in a generation or culture where everything is so processed. Cooking real food has become a lost art. 

Chicken nuggets are still as popular as ever. They’re jam packed in grocery store freezer isles and on almost every restaurant menu. Of course they’re on fast food menus too.
​
The thought of that makes me cringe a little. I haven’t had any of those versions since I was a very young child. But I still love chicken nuggets. 

Here’s the thing, chicken nuggets are so easy to make!


Skip the processed, packaged ones and make your own instead. Homemade chicken nuggets are so much healthier too!

This version is free of grains, uses a super healthy fat to cook the chicken in {avocado oil} and only has a few simple ingredients. Bonus … they taste so good too! My family goes crazy for these chicken nuggets. They disappear so fast, it seems like we never make enough. 

So grab yourself some organic chicken and make up a batch or two of chicken nuggets. Make sure to serve them with some yummy sauce and dip those perfect little crispy bites in some honey mustard, ketchup or any other homemade sauce. 
​

Ingredients:

  • 1 pound organic or pastured chicken breast, cut into 1″ pieces 
  • 1/4 cup arrowroot flour
  • 1 teaspoon Celtic sea salt
  • 1 teaspoon garlic powder
  • 1/2 teaspoon dried thyme
  • Avocado oil for frying, enough oil for a shallow fry 


Instructions:

  1. Cut chicken into 1″ pieces with kitchen scissors or a sharp knife. Set aside. 
  2. In a shallow dish, combine arrowroot flour, sea salt, garlic powered, and thyme. Stir to combine. [Note: If you have a spice grinder or blender like a Twister Jar, you can throw all of these ingredients in and pulse it really quick to finely grind up all ingredients. I like to do this in Twister Jar, it helps turn the thyme into a powder. This is completely optional.] 
  3. Add pieces of chicken, one at a time, to the flour mixture. Toss them around until they are evenly coated on each side. Set aside.
  4. In a large sauté pan over medium-high heat, add avocado oil, about 1/4-1/3″ inch deep. Allow avocado oil to get hot, about 2 minutes. Add a single layer of chicken, being sure not to crowd them and reduce heat to medium. Fry on each side over medium heat until golden brown and completely cooked through. Depending on the size of your sauté pan, you might have to do this in two batches. (Note: If you like them extra crispy, like my family does, cook the chicken nuggets a little longer.) 
  5. Serve hot with your favorite dipping sauce.
​

Notes: 

  • Servings: 2-3
  • Serving Suggestions: Serve with you favorite dipping sauce like honey mustard, BBQ sauce, organic ketchup or homemade ranch. My family loves to eat these with honey mustard dipping sauce.
  • How to Make a Simple Honey Mustard Dipping Sauce: Combine equal parts raw honey and organic Dijon mustard {or horseradish mustard}. Stir until fully incorporated.

Recipe by Emily Sunwell-Vidaurri, founder and author of Recipes to Nourish
Comments
<<Previous
Just Breathe

Latest Blogs

Kava DSM Fall Favorites...
5 Spices You Should Be Cooking...
​Stuffed Zucchini Boats 2 Ways
​
Cassava Flour Chocolate Cake

Useful Links

About Sarah
Recipes
Blog
​Contact

About RLO

Real Life Outlaw is dedicated to providing crucial nutrition facts and individual health advisory.
​© 2021 Real Life Outlaw. Site by Northgate Marketing