• Home
  • Recipes
  • Blog
  • About
  • Contact
  • Home
  • Recipes
  • Blog
  • About
  • Contact
Real Life Outlaw
  • Home
  • Recipes
  • Blog
  • About
  • Contact

Blog

by Sarah Outlaw
Access Octomono Masonry Settings
I blog about real food, nutrition, DIY, and herbal wisdom…the Outlaw way!
    Picture

    About Me

    ​I want to help change the lives of others the way my life was changed through better health. I am an advocate of getting back to natural, as much as possible. 

    Subscribe

    email > Subscribe
    Categories


    All
    Adaptogen
    Almond
    Asparagus
    Autumn
    Baby
    Blueberry
    Breakfast
    Butternut Squash
    Cake
    Chia
    Chicken
    Chicken Wings
    Chocolate
    Cocktail
    Coconut
    Cold
    Cucumber
    Desserts
    DIY
    Drinks
    Electrolyte
    Food Allergies
    Fruit
    Gelatin
    Ginger
    Gluten Free
    Gluten-Free
    Grain Free
    Harvest
    Herbal
    Holiday
    Honey
    Ice Cubes
    Kickstarter
    Lip Scrub
    Macaroons
    Main Dish
    Mangos
    Meal Plans
    Migraines
    Mocktail
    Natural Living
    Nuggets
    Oatmeal
    Organic
    Parfait
    Peaches
    Peanut Butter
    Pear
    Picnic
    Pot Cream
    Protein Balls
    Pumpkin Pie
    Radish
    Ranch
    Real Food Basics
    Real Life
    Recipes
    Remedies
    Salad
    Shrimp
    Side Dish
    Smoothie
    Smoothie Bowl
    Snacks
    Sore Throat
    Soup
    Spaghetti
    Spices
    Spicy
    Squash
    Sriracha
    Strawberry
    Stress Relieve
    Summer
    Tea
    Teriyaki
    Toddler
    Varicose Veins
    Waffle
    Water
    Weight Loss
    Workout
    Yogurt
    Zucchini

    ARCHIVES

    Archives

    November 2021
    October 2021

    RSS Feed

⇠ Back To Blog

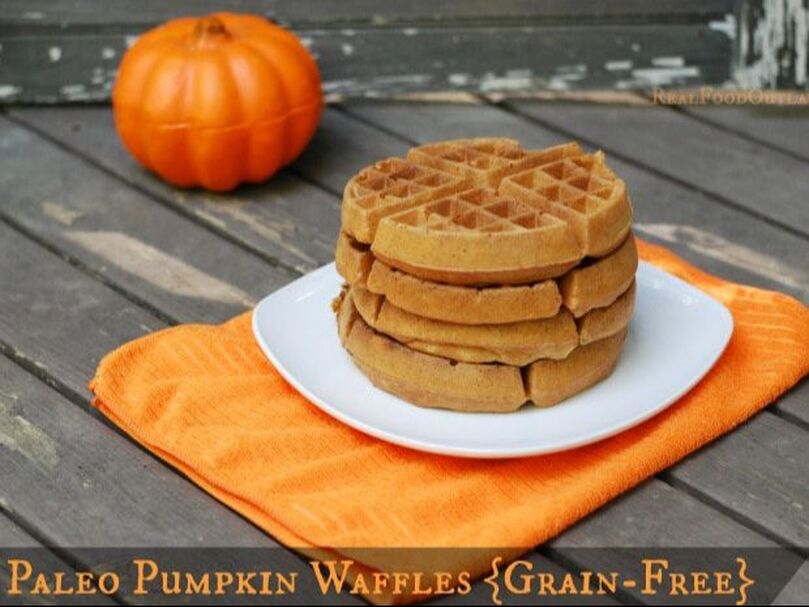
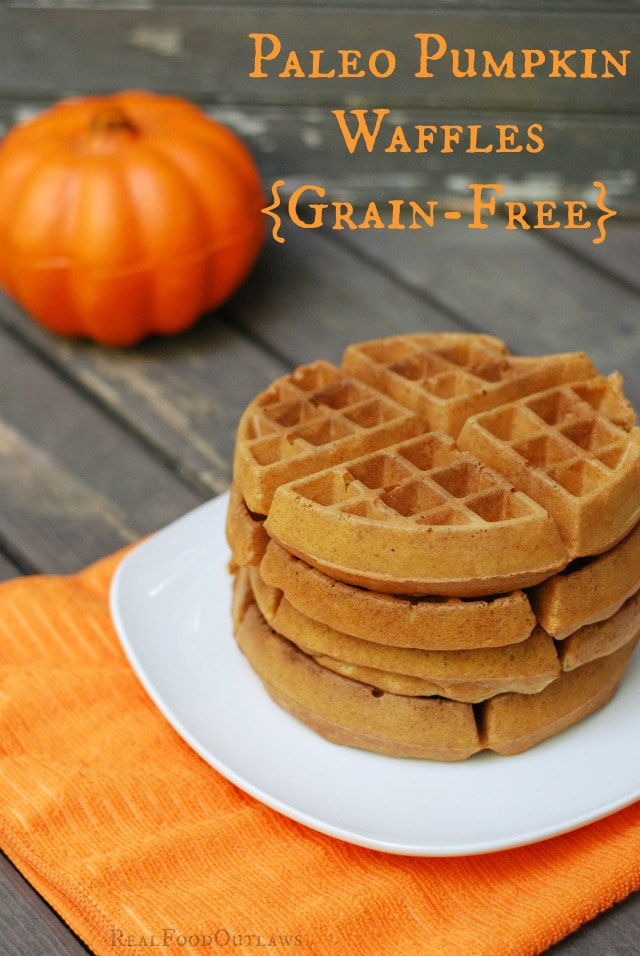
Paleo Pumpkin Waffles (Grain-Free)

2/8/2022

 
Picture


I am more than a little obsessed with grain-free, paleo waffles!

​
It’s really hard to improve on waffle perfection, and Hayley from Health Starts in the Kitchen’s waffles really are perfect! If you haven’t tried them yet, you must!

I wanted a yummy fall twist and to make them even more nutrient-dense, so using her recipe as inspiration, I went to work creating grain-free, paleo pumpkin waffles.

Pumpkin pie spice is star of my fall. It’s what really gives a recipe that pumpkin pie flavor. I use it in everything from coffee, to pancakes, to waffles. I buy mine already blended from Frontier, but it’s available at Amazon. You can also make your own with this recipe from Live Simply. 

If you don’t have homemade pumpkin puree already prepared from a recipe like this one from Naturally Loriel, use canned pumpkin. Make sure it’s organic and from a non-BPA can like this one.

Before I get yelled at for using milk in a paleo recipe, yes I do know that milk isn’t strict paleo. I also know that many paleo peeps use raw dairy if they can tolerate it. It’s a grey area. Raw milk is very nutrient dense so if you can have it, do!

I use gelatin hydrosylate in many of my recipes to add to the nutrient-denseness. This is optional and can be left out if you don’t have it. 

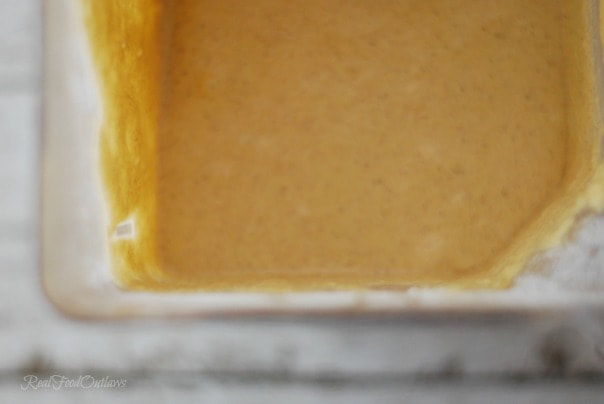
I make all my batters in my Blendtec blender. It makes less cleanup for me, and a nice, smooth batter every time. I don’t need any extra work, and neither do you!
​

Picture


I don’t know what it is about dutifully plopping batter into a waffle iron that makes me so blissfully happy…maybe it’s knowing what amazing goodness I’m about to put into my mouth. It’s the anticipation! That and the joy on my kids’ faces when I yell, “Kids, the waffles are ready!” They come running! I always eat the first waffle before they get to the table or I won’t get one. 🙂
​
Ingredients:
​
  1. 2 cups raw milk, coconut milk, or almond milk
  2. 2 tsp raw apple cider vinegar
  3. 2 cups almond or cashew flour
  4. 1 cup tapioca or arrowroot flour/starch
  5. 2 TBS coconut flour
  6. 2 TBS gelatin hydrosylate
  7. 1 TBS baking powder
  8. 1/2 tsp sea salt
  9. 1 TBS pumpkin pie spice
  10. 2 eggs (or 2 egg yolks plus 2 TBS chia gel)
  11. 1/2 cup coconut oil, butter, or ghee
  12. 1/2 cup pumpkin puree
  13. 2 TBS maple syrup or raw honey (optional)


Instructions:
​
  1. Preheat waffle iron.
  2. In a high-powered blender, add all ingredients.
  3. Blend until combined.
  4. Batter should be pretty thick, but add more milk or water to thin if not pourable.
  5. Pour batter into waffle maker and cook one at a time.
  6. Serve with extra butter if desired, and syrup (optional).


These waffles are more dense and less crispy than the originals. They need to be cooked thoroughly so check with a fork for doneness. When they are ready to come out, they will do so easily. If they fall apart, they’re not ready. 

I eat them plain, like a cookie, but they are great with a little maple syrup too!

Be nourished. Be happy.
​Enjoy!

Picture
Comments
⇠ Back To Blog

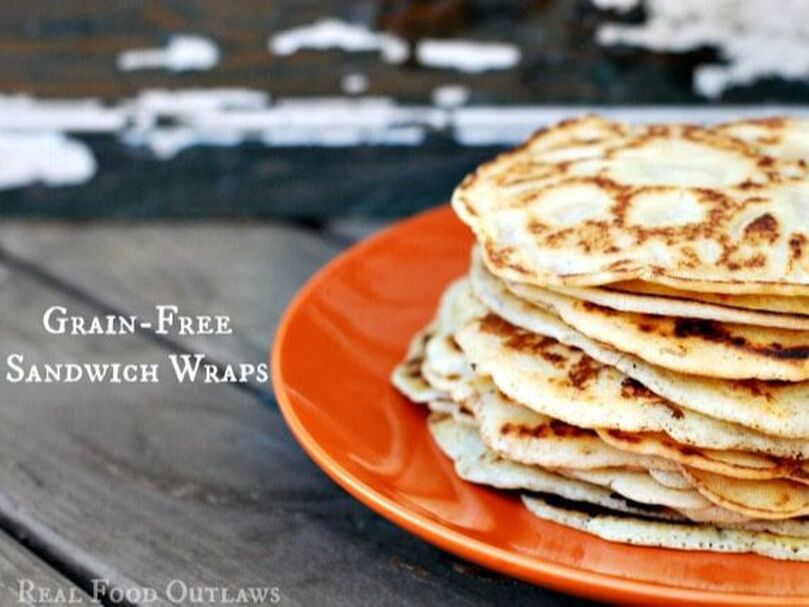
Grain-Free Sandwich Wraps

2/7/2022

 
Picture


I am super excited about this recipe! I have been playing around with varied recipes for flat bread and tortillas from My Heart Beets and Health Starts in the Kitchen and absolutely love the results I’ve gotten! I tweaked the recipes a bit because I was in need of a sandwich wrap and am in love with arrowroot flour!

My kids love sandwiches for lunch. My oldest asked if I could please make him wraps even though we are grain-free for January. I had made the flat bread/tortillas earlier in the week for the Salmon Salad recipe and knew they would probably work as wraps, but I wanted something a little more nourishing and filling. So, grain-free sandwich wraps were born!

Arrowroot is wonderful for the gut. It soothes irritated bowels and has a calming quality that can be very healing. It is in stark contrast to some grains that can harm the guts of those sensitive to them. It is sold as arrowroot starch, powder or flour. They are all the same thing. You can also use tapioca starch/flour. It’s slightly “stiffer” but works beautifully. 

Coconut milk contains lauric acid, antimicrobial lipids and capric acid. These constituents make these a very beneficial milk. Heating it will destroy most of the properties that using it raw would keep intact, but it is still a very healthful ingredient to use in recipes.

Almond flour should be used in moderation. It takes about 90 almonds to make 1 cup of almond flour. Check out this article from Empowered Sustenance about the problems with almond flour.  I have read the pros and cons and still choose to use it…just not in everything and not all the time. Coconut flour is a good alternative and I will be experimenting with it for wraps very soon.

Gelatin Hydrosylate – This doesn’t actually “gel” in the recipe because it is a hydrosylate, but I like to sneak in gelatin to recipes whenever I can. It adds protein, amino acids and other valuable nutrition. For more information about gelatin and gelatin hydrosylate, click here.

The yield for the recipe is about 12 6-inch wraps (the egg-free version makes about 6). I make a big batch and refrigerate the extras to use throughout the week. I’m assuming you can freeze them, but I haven’t tried to be sure. 
​
The recipe contains clickable ingredient links with suggestions on where to purchase.
​
Prep Time: 5 minutes
Cook Time: 1 hour
Yield: 22

Ingredients:
​
  • 2 cups blanched almond flour
  • 2 cups arrowroot flour or tapioca flour
  • 1 tsp aluminum-free baking powder
  • 1/2 tsp salt (I like Real Salt)
  • 4 TBS gelatin hydrosylate (optional)
  • 2 cups coconut milk (or raw, whole milk)
  • 4 pastured eggs
  • Butter, ghee or coconut oil to grease skillet

Egg-Free Alternative Recipe (My favorite)
  • 1 cup almond flour
  • 1 cup tapioca or arrowroot flour/starch
  • 2 3/4 cups water (less for thicker wraps, more for thinner wraps)
  • 1/2 tsp salt


Instructions:

  1. Mix all ingredients together in a large bowl until thoroughly combined into a thin batter.
  2. Heat a cast-iron skillet.
  3. Once heated, spread a small amount of fat onto the skillet.
  4. Pour or ladle batter into skillet in desired wrap size.
  5. Wait until you see bubbles (1-2 minutes) and flip with a spatula.
  6. Allow to slightly brown on the other side.
  7. Flip back over if needed and remove to a plate.
  8. Repeat process.
  9. Transfer to a cooling rack so they don't get soggy.
​
Picture

These take awhile to make if you do them one-at-a-time. I use a cast iron skillet and make them one-by-one. I suggest you use a large pancake griddle if you are short on time and do a few at once. I use it as an opportunity to multitask and unload my dishwasher and clean my kitchen! Just be mindful of the stove. If you’re absent-minded like me and really get into your cleaning, you may forget you are cooking something!

I hope you like these grain-free sandwich wraps! They roll quite nicely and don’t break or tear. My kids like to grill their sandwiches in our panini maker and it works out perfectly with these.


Be nourished. Be happy.
Enjoy!

Comments
⇠ Back To Blog

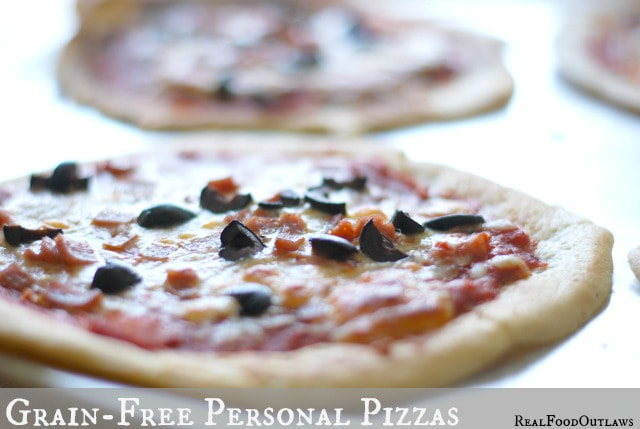
Grain-Free Personal Pizzas

2/7/2022

 
Picture


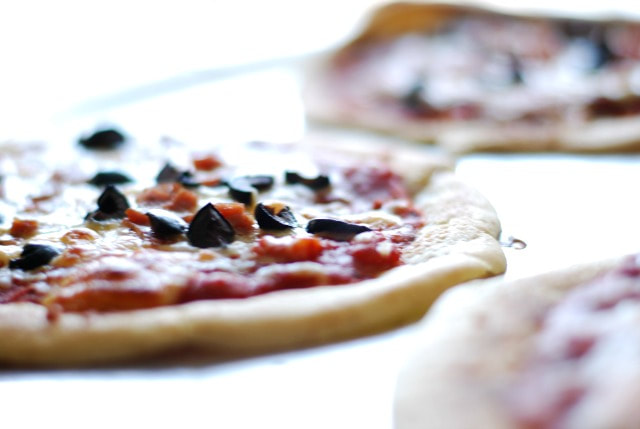
Pizza is one of my favorite foods! If you ask my kids, they will all say the same thing! When they heard we were going grain-free for the month of January they were very upset that we wouldn’t be eating pizza, which is our Saturday night tradition.

Last night, we decided to make grain-free personal pizzas using yet another variation on our favorite flat bread recipe. It was a little time-consuming but we worked together as a family and had a fun “Toppings Bar” so everyone could make their own. 

Going on a special “diet” does not have to be boring. You can still  have all  of your favorite foods, just real foodified and healthier. Homemade pizza in general is a healthy choice. Choose organic ingredients, full-fat cheese and other healthy topping options.

Picture

 If the batter is too thick, thin with water. If you can’t get it not fall apart, add an egg. It was fine without an egg for me, just needed a little thinning with water.

If you decide to use vegetables or bacon for toppings, you will need to cook them first. Once the cheese and toppings are on the pizzas, they only cook until the cheese is melted. 

If you want a softer crusted pizza don’t crisp the crusts as long in the oven. If you do like that crispy, thin-crust style, let them stay for awhile longer so they don’t get too soft from the toppings. 
​
UPDATE: I make these flat breads at least two times a week using 2 cups almond flour, 2 cups tapioca flour, 2 cups water, and 1/2 tsp sea salt. We use them for sandwich wraps, burritos, fajitas, crepes, and pizzas. They are very versatile!

Yield: Approx. six 6-8 inch pizzas

Ingredients:

​For Crust:
  • 2 cups almond flour (I like this brand)
  • 2 cups tapioca starch/flour (I like this brand)
  • 2 cups coconut milk (I like this brand), or plain, filtered water.
  • 1/2 tsp salt (I like Real Salt)

For Toppings:
  • Cheese
  • Sauce
  • Olives
  • Bell Peppers
  • Onions
  • Mushrooms
  • Bacon


​Instructions:

For Crust:
  1. Mix ingredients in either a blender (works much better in a blender) or bowl until smooth.
  2. Heat a skillet (works best in a cast iron skillet) or griddle on medium-high heat and add a small amount of butter to cover the pan.
  3. Pour a thin layer of batter onto griddle or skillet and allow to cook until bubbles form (if batter is too think, add water to thin).
  4. Test to see if you can flip easily. If not, let cook longer (it should not be gooey inside).
  5. Cook on other side until slightly golden-brown.

For Toppings:
  1. Preheat oven to 350 degrees F and place finished crusts in for a few minutes to crisp up.
  2. Place sauce on the pizza crusts and arrange cheese and toppings as desired. You may need to cook some of the toppings first if they are "liquidy", i.e. mushrooms, peppers, bacon, etc.
  3. Bake until cheese is melted.
  4. Cut into 4 pieces each and serve.
​
Picture

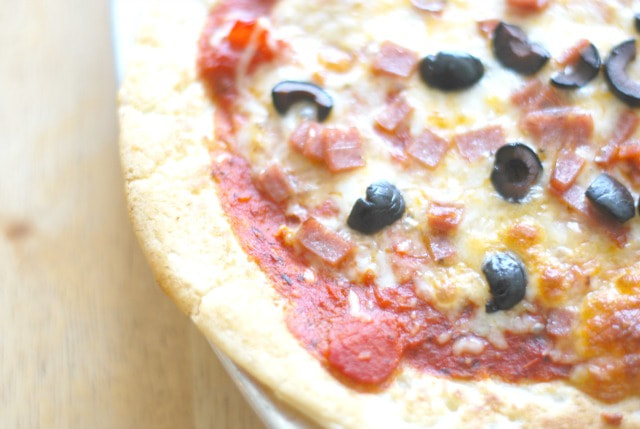
​These were so good that we had leftovers for lunch today. They are the perfect size for one person and are so crispy and delicious!

If you are grain-free and miss pizza, this is one way to still enjoy it!


​Be nourished. Be happy.
Enjoy!

Comments
⇠ Back To Blog

Grab ‘n’ Go Pancake Muffins from Everyday Grain-Free Baking

2/7/2022

 
Picture

I’ve been a devoted reader of The Nourishing Home Blog for a very long time. I love Kelly’s fresh take on recipes that are practical for my busy family. I am so excited to have the chance to review Kelly’s new book, ‘Everyday Grain-Free Baking‘, AND share her Grab n’ Go  Pancake Muffins (AKA Pancake Muffins on the Go) recipe!

With more than 100 irresistible recipes, Everyday Grain-Free Baking teaches you how easy it is to create grain-free, dairy-free versions of all your favorite baked goods.

From breads, biscuits and muffins to savory snacks and decadent treats, you’ll find step-by-step instructions, beautiful color photographs and helpful tips & tidbits to make all of your GF baking adventures a delicious success!

Here’s a quick overview of what you’ll find in Everyday Grain-Free Baking
​
  • More than 100 delicious, easy-to-make recipes that are gluten-free, grain-free, starch-free, refined-sugar-free and dairy-free, or contain dairy-free options.
  • My Journey to Healing is Kelly’s personal story shared to inspire those suffering from chronic illnesses that there is hope!
  • Why Bake Grain-Free? outlines the many benefits of grain-free baking.
  • Strategies for Maximizing Success features Kelly’s personal tips for ensuring that all of your grain-free baking adventures receive rave reviews!
  • My Grain-Free Kitchen includes an overview of the key ingredients that make grain-free baking a success, as well as recommendations for helpful baking essentials.
  • Tips & Tidbits and Recipe Variations are included throughout the book to make each recipe a snap – and provide you with even more options for making amazing grain-free baked goods that taste just like traditional favorites!
​
Picture

As shown above, Everyday Grain-Free Baking features a delicious assortment of recipes the whole family will love! In fact, there’s an entire chapter devoted to each of these traditional baked good favorites:
​
  • Breads & Rolls
  • 
Biscuits
  • Scones & Crackers
  • Muffins
  • Pancakes & Waffles
  • Pies, Tarts & Crisps
  • Cakes & Cupcakes
  • Classic Cookies
  • Brownies & Bars
  • Sweet Additions
​
Picture

Kelly’s mission in creating Everyday Grain-Free Baking is to transform the everyday comfort foods we each hold dear into delightfully flavorful and satisfying grain-free versions that are so remarkably similar to traditional gluten-based foods that everyone will enjoy these recipes, whether or not they’re living a GF lifestyle.

In fact, Kelly’s recipes really do taste like the real deal, because she knows so many of us struggle with the same challenge – trying to make tasty healthy foods that the whole family can enjoy without having to become a short-order cook!

As we all know, this can be especially challenging when some members of your family are living grain-free, while other members of your family are not. Finding recipes that will work for everyone that actually taste AMAZING is what Everyday Grain-Free Baking is all about! 
​
 Without further ado, here is Kelly’s Grab ‘n’ Go Pancake Muffin recipe!

Ingredients:

  1. 1/3 cup plain coconut milk yogurt (or coconut milk)
  2. 2 tablespoons unsalted butter (or coconut oil), melted
  3. 1 tablespoon honey (or maple syrup)
  4. 1 teaspoon pure vanilla extract
  5. ¼ teaspoon apple cider vinegar
  6. 1¾ cups blanched almond flour
  7. ½ teaspoon baking soda
  8. ¼ teaspoon sea salt
  9. 3 large eggs
  10. ¼ cup diced strawberries
  11. ¼ cup whole blueberries


Instructions:
​
  1. Preheat oven to 350°F. Grease 8 muffin cups in a 12-cup muffin tin with coconut oil. Set aside.
  2. Place all of the liquid ingredients except the eggs into a blender or food processor. Then place all of the dry ingredients on top. Cover and blend on low 10–15 seconds just until well combined. (Batter will be thick.)
  3. Add the eggs and blend on low about 15–20 seconds, then increase to high and blend 20–30 seconds, just until eggs are incorporated into the batter. (Do not overmix or muffins will not be tender.)
  4. Transfer the muffin batter to a bowl and fold in the berries. Evenly divide the pancake muffin batter among the 8 prepared muffin cups.
  5. Bake for 15–18 minutes, until slightly golden brown on top and a toothpick inserted into center comes out clean.
  6. Remove from oven and allow muffins to cool 2–3 minutes in the tin. Run a knife around the edges of each cup and invert the pan over a sheet of parchment. Then grab a couple and go!


These were so easy to make, and my kids and I really liked them! We will definitely be adding these into our breakfast rotation!
​
​Be sure to grab your copy of Everyday Grain-Free Baking today and rediscover the joy of baking everyday favorites your whole family will love! 

Picture
Comments
⇠ Back To Blog

Grain-Free Weekly Meal Plan 6/15 – 6/20

2/7/2022

 
Picture


It’s a brand new grain-free weekly meal plan for you and back to Florida for training for me this week! 


​It’s been my busiest week at the office to date, but I still got out two fresh blog posts for you. I’ve been itching to share my favorite Basil and Thyme Vinaigrette, and Radish and Cucumber Salad recipes. With summer produce in full swing, I don’t want anything going to waste. If you have recipes for the less common vegetables, you’ll be more likely to use them up!

The questions I get asked the most from readers and clients are breakfast related. It’s tough to find things to eat if you are sensitive to grains and eggs! I understand. I was off eggs totally for about 4 months and then was able to add just the yolks back in. Even now, over a year later, I don’t eat eggs very often. I used to eat 3 dozen a week myself! After not eating them for such a long time, you tend to find things you like better. I try to keep a variety of breakfasts in each week’s meal plan. Be creative! 

What about when you travel? What do you eat then?

I still eat grain-free. It’s much easier to eat grain-free than gluten-free when traveling. I just order meat and vegetables and have the most delicious meals. Once you re-train your body not to want to fill up on bread and other carbs, you never want to go back!

Monday
Breakfast – Avocado Bacon Cups (avocados and bacon are my favorite breakfast!)
Lunch – Mayo-Free BLT Coleslaw
Dinner – Coconut Crusted Salmon

Tuesday
Breakfast – Kielbasa, Pepper, Onion, and Potato Hash
Lunch – AIP Tuna Salad
Dinner – Cilantro-Garlic Mahi Mahi (or use parsley if you don’t like cilantro)

Wednesday
Breakfast – Paleo Breakfast Burritos (can use just egg yolks if whites are an issue)
Lunch – Peach, Cherry and Green Bean Salad with Basil Vinaigrette
Dinner – Paleo Chicken Marsala

Thursday
Breakfast – Paleo Breakfast Portobello Mushroom Burger
Lunch – Best Ever Brussels Sprouts or Greens with Cherries and Nectarines
Dinner – Grain-Free Meatloaf with Radish and Cucumber Salad

Friday
Breakfast – Breakfast Biscuit Sandwiches
Lunch – Grapefruit and Avocado Salad with Shrimp (I leave out the grapefruit and make sure the shrimp are wild caught.)
Dinner – Teriyaki Chicken Wings

Saturday
Breakfast – Sweet Potato Kale Hash
Lunch – Chinese Shredded Chicken and Cucumber Salad
Dinner – Spanish Cod One Pot or Grilled Zucchini Nachos


Be nourished. Be happy.
Enjoy!

Comments
⇠ Back To Blog

Grain-Free Weekly Meal Plan 7/13 – 7/18

2/7/2022

 
Picture


Welcome to this week’s all new, grain-free meal plan!


​Here are six days worth of ideas to change up your normal meals and try something different. Not all recipes will cater to everyone’s specific dietary requirements, so just take the ones you can use and modify the rest if desired. 

Just changing your food is not enough to fix the underlying issues in your body. I’ve heard quite a few people this week say that they don’t need any kind of supplementation, nor do they need to know what’s causing their symptoms. All they need to do is change their diet and they’ll be cured. 

This isn’t true. You WILL experience relief if you change your food to healthier options, take out grains, etc. However, unless you know what your the underlying causes of your symptoms were in the first place and fix those, you will not be able to truly correct your health. Whole food supplements (therapeutic food) ARE needed to help repair organs and heal the gut so that your body is actually able to use your own food. 

Our guts are so damaged.

Food IS they key, but you have to be able to heal your body to actually use the food you eat. 

Monday
Breakfast – Tropical Turmeric Smoothie
Lunch – BLT Bowl
Dinner – Crockpot Ranch Carnitas (or use beef)

Tuesday
Breakfast – Root Vegetable Hash with Bacon
Lunch – Thai Beef Salad
Dinner – Chicken Pesto “Noodle” Bowl

Wednesday
Breakfast – Low-Carb No Egg Breakfast Bake with Turkey Breakfast Sausage and Peppers
Lunch – Marinated Asian Sesame Cucumber Salad
Dinner – Skirt Steak Fajitas

Thursday 
Breakfast – Meat Bagels
Lunch – Cucumber “Pasta” Salad
Dinner – Garlic and Greek Lamb Kabobs

Friday
Breakfast – Bacon Wrapped Avocado
Lunch – Asian Lettuce Wraps
Dinner – One Skillet Chicken Thighs with Butternut Squash

Saturday
Breakfast – Super Food Cereal
Lunch – Kale Salad
Dinner – BBQ Chicken Flatbread Pizza


Be nourished. Be happy.
​Enjoy!

Comments
⇠ Back To Blog

Garlic Zucchini Fries (Grain-Free)

2/7/2022

 
Picture
Garlic Zucchini Fries are so delicious! These savory beauties are garlicky, salty, and tender with optional parmesan cheesy goodness. Plus they’re a wonderful, healthier alternative to regular fries.

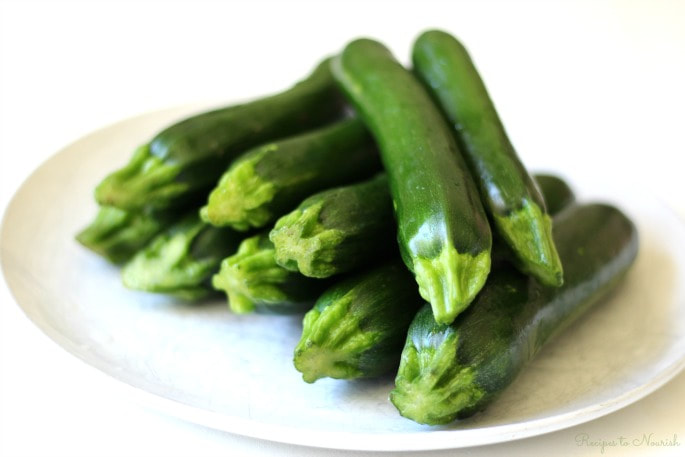
It’s summertime and that means zucchini galore! 

There is always an abundance of zucchini during the summer. There are so many ways to use up this summer bounty. Zoodles, zucchini muffins, zucchini waffles, zucchini bread, zucchini cake, zucchini frittatas, zucchini soup, zucchini pancakes, zucchini fritters, zucchini cookies … you get the picture. 

People go crazy for zucchini when summer comes around. Do you love zucchini as much as everyone else? I love it for so many reasons. 

Zucchini is so easy to prepare. That’s one of the reasons I love it so much. It can be sautéed in minutes for a quick weeknight veggie. It’s great thrown into casseroles, soups, pasta, meatloaf, and so much more. 

Then there’s zucchini fries … oh my goodness they are so yummy and addictive. The best part … they’re so easy to make! It’s almost not even a recipe because it’s so simple.

All you have to do is grab a bunch of zucchini from the market or your backyard if you’re lucky enough to have them growing. Cut them up into “fries”, mix them around with some melted healthy fat of choice, Celtic sea salt and some garlic powder. So easy! 
​
You can stop there … or if you can eat dairy, I highly recommend sprinkling some finely grated parmesan all over the zucchini fries. It’s so good! 
​
Picture


Then pop those healthy fries into the oven and bake them until they’re just perfect and light golden brown around the edges. 
​
My family goes crazy for these delectable garlic zucchini fries! They disappear so fast, I always end up wishing I had made more.  

by Emily @ Recipes to Nourish

Ingredients: 
  • 5 small zucchini 
  • 2 tablespoons melted ghee, grass-fed butter or avocado oil
  • 1 tablespoon garlic powder 
  • 1 teaspoon Celtic sea salt 
  • 1/3 cup finely grated parmesan cheese – optional, omit for dairy free


Instructions: 
​
  1. Preheat oven to 400 degrees F. Line baking sheet with unbleached parchment paper. Set aside.
  2. Remove ends from zucchini and slice in half lengthwise. Slice in half again widthwise. Then slice into fourths lengthwise creating thin “fries”. 
  3. In a shallow dish, toss zucchini fries with melted ghee/butter or avocado oil, garlic powder and sea salt. Use clean hands to mix around and evenly coat. 
  4. Line zucchini fries on prepared baking sheet, flesh side facing up. Sprinkle and evenly distribute parmesan over the tops of the zucchini fries.    
  5. Place in oven and lower heat to 350 degrees F. Bake for 25-35 minutes or until parmesan is light golden brown and zucchini fries are cooked through and start to have light golden brown edges. 


Notes: 
​
  • Yield: 4-6 servings. 
  • Recipe can easily be doubled, but you might need to spread it out on two baking sheets. 


Eat Well & THRIVE!
​
Picture
Comments
⇠ Back To Blog

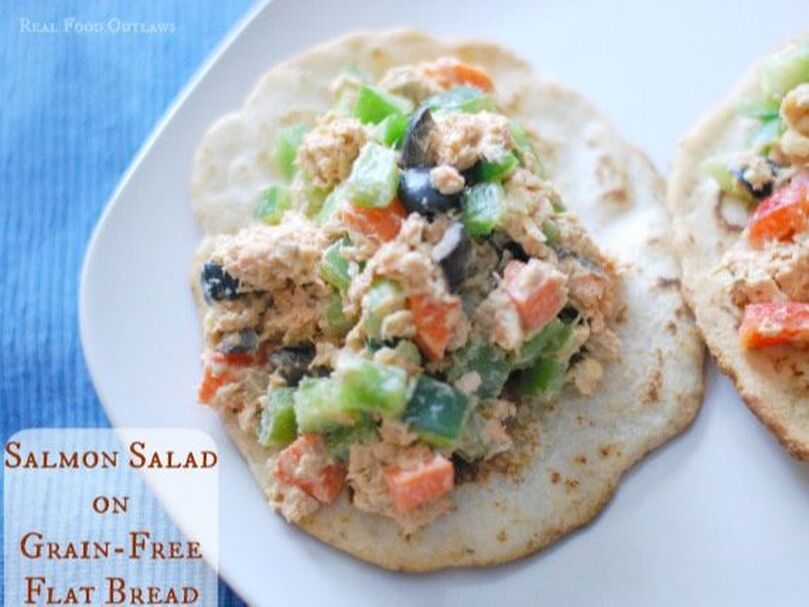
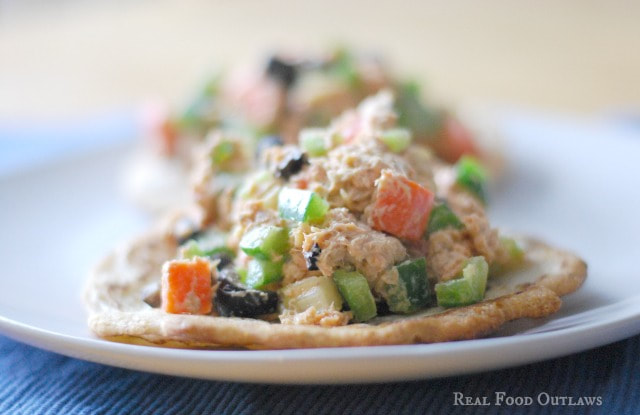
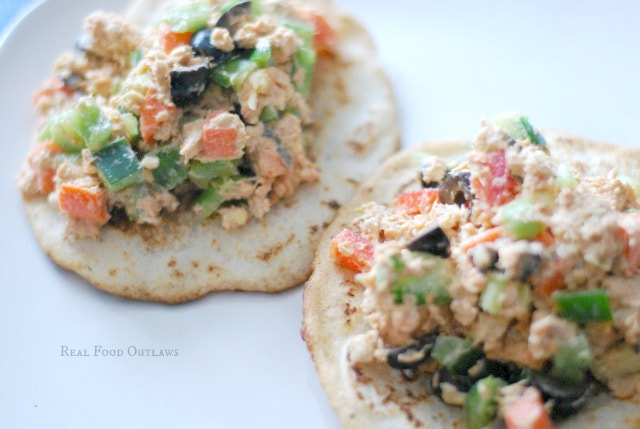
Salmon (or Tuna) Salad on Grain-Free Flat Bread

2/7/2022

 
Picture


If you’ve been with us this month  so far, you know that we are grain-free for January. This is something we did last April and it both got my creative juices flowing AND helped me shed some extra pounds that I was hanging onto postpartum. 

I have to tell you, my kids were not happy about the “no-bread” thing. What they don’t realize is that mommy can make “bread” with no grains! Once I convinced them of this, they were much more cooperative with our plan for the month. 

I have the privilege of networking on a daily basis with some pretty incredible bloggers. We have a couple of Facebook groups where we chat daily about recipes and natural living. It’s been the main reason my blog has grown the way it has over the last few months. I couldn’t do this without them!

I tell you all that to tell you this. The flat bread  recipe I’m using with this salmon (or tuna) salad on grain-free flat bread comes from two of the bloggers in that group and I am so excited to share it with you!

I first saw a recipe for grain-free naan from Ashley over at My Heart Beets. I bookmarked it! I then saw a grain-free flat bread recipe over from Hayley over at Health Starts in the Kitchen and knew I just had to try it. They are friends who live close enough to each other to do lunch. I’m so jealous!
​
You’ll have to click over to their sites which are both linked above to get the  flat bread recipes in their  entirety, but look around while you’re there! It’s worth it! You will LOVE their blogs! I spend a lot of time on both!

Picture


For the flat bread: For 6 servings, double the flat bread recipe. For 3 servings, make half the salmon salad recipe or just have lots of extra to eat on its own. 🙂

Any kind of salad like this is very forgiving. You can add or take away whatever you want and it will still turn out great. This recipe can be modified to your tastes and preferences. Don’t be afraid to experiment!

Please Note: You will need blanched almond flour and tapioca starch/flour for the flat bread. 
Need a dairy-free mayo recipe? Try this coconut and avocado oil mayo recipe from Jessica at Delicious Obsessions. Yum!!!

Ingredients:
​
  • 3 (6+ oz) cans of Alaskan pink salmon or 4 (5oz) cans tuna (or the equivalent in leftover cooked salmon or tuna)
  • 1/3 cup mayonnaise (preferably homemade and can be non-dairy)
  • 1 TBS organic mustard
  • 1/2 tsp smoked paprika
  • 1/4 tsp salt (I like Real Salt) or to taste
  • Black pepper to taste
  • 1-2 carrots (peeled and chopped)
  • 1/2 stalks of celery (chopped)
  • 1 bell pepper (I used 1/2 red and 1/2 green pepper)
  • 1/2 cheese - optional - (shredded or chopped)
  • 1/2 cup black olives (chopped)


Instructions:
​
  1. Prepare Naan/Flat Bread according to instructions at either My Heart Beets or Health Starts in the Kitchen.
  2. Strain salmon or tuna and place into a medium-sized bowl.
  3. Add mustard and mayonnaise and mix well.
  4. Add seasonings and mix.
  5. Add remaining ingredients and blend well.
  6. Serve on flat bread.
​
Picture


This salmon salad was very enjoyable and the grain-free flat bread was slightly crisp on the outside and tender in the middle. It was perfect! I was asked to make it again tomorrow for lunch!

Be nourished. Be happy.

Enjoy!

What challenges have you faced when changing your diet? Opposition from family members? The tendency to go back to old habits? Tell us in comments. 
Comments
⇠ Back To Blog

Grain-Free Chocolate Chip Banana Bread

2/7/2022

 
Picture


Banana bread is a staple in our house. We get bananas free from our church’s food ministry so I always have an abundance. My favorite banana bread recipes are Organic Chocolate Chip Banana Bread and Soaked Banana Bread. Or, at least they were…

Now that we are grain free (at least for January) I needed a grain-free alternative. I wasn’t about to waste overripe bananas. I found a grain-free banana bread recipe over at my friend Kristen from Rethink Simple’s blog that is amazing! I asked her if it would be ok to modify it for my blog and she said yes! Yay! Now there’s a new banana bread in town!

I’ve made this grain-free banana bread 6 times in the last week-and-a-half. I kid you not! I am serious about getting a recipe perfect! I used Kristen’s base recipe for things like flour, eggs and baking powder amounts but revamped it because I wanted to add some ingredients.

When working with coconut flour you have to make sure you have enough liquid. Coconut flour is very fibrous and quickly absorbs the liquid that is added to it. If you don’t add enough, you will have a very grainy and rather unpleasant end result. 

I’ve been obsessed with adding gelatin to everything lately! I like to use Gelatin Hydrolysate for recipes that don’t need to be “gelled”. It adds nutrients to whatever it’s added to. You’ll see it pop up in many of my more recent recipes. 
​
As always, there are links within the recipe itself to where you can easily purchase the ingredients. 

Ingredients:
​
  • 1/2 cup coconut flour
  • 1 tsp baking powder
  • 1/4 tsp salt (I like Real Salt)
  • 4 ripe bananas
  • 4 eggs
  • 1/4 cup coconut oil
  • 3 TBS to 1/4 cup maple syrup (grade B has more minerals)
  • 2 TBS applesauce (here is a recipe for homemade)
  • 2 tsp vanilla (I like homemade or this brand
  • 2 TBS gelatin hydrolysate - CANNOT use regular gelatin!
  • 1/2 to 1 cup soy-free chocolate chips (can buy here or here)


Instructions:
  1. Preheat oven to 350 degrees F.
  2. Line a loaf pan (bottom and sides) with parchment paper.
  3. In a large bowl crack eggs and add coconut flour, baking powder and salt. Mix well.
  4. Mix gelatin and maple syrup together in a small bowl and add to mixture.
  5. Melt coconut oil if solid and add to bowl along with remaining ingredients.
  6. Mix well and allow to sit for about 5 minutes.
  7. Pour into prepared pan and bake at 350 degrees F for about 1 hour. It takes mine about 1 hour 10 minutes for a knife inserted in the center to come out clean.
  8. Remove from oven and allow to cool on a baking rack.
  9. Can be eaten warm or cold.
  10. Store in the refrigerator.


This Grain-Free Chocolate Chip Banana Bread is my new favorite recipe! It is very moist and not overly sweet. I have to make two loaves for it to last into the next day with my hungry crew!


​Be nourished. Be happy.
Enjoy!

Comments
<<Previous
Just Breathe

Latest Blogs

Kava DSM Fall Favorites...
5 Spices You Should Be Cooking...
​Stuffed Zucchini Boats 2 Ways
​
Cassava Flour Chocolate Cake

Useful Links

About Sarah
Recipes
Blog
​Contact

About RLO

Real Life Outlaw is dedicated to providing crucial nutrition facts and individual health advisory.
​© 2021 Real Life Outlaw. Site by Northgate Marketing